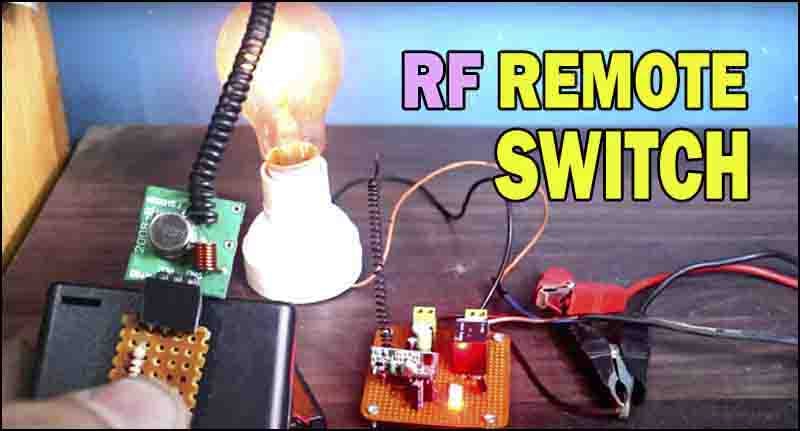
Introduction
In this era of automation, remote-controlled devices have become an integral part of our daily lives. RF remote relay switch is an excellent example of such devices that allow us to control electrical equipment wirelessly. In this article, we will discuss how to create a DIY RF remote relay switch using commonly available components like CD4017 IC, 433Mhz RF modules, and BC547 transistor.

Circuit Diagram of RF Remote Relay Switch
This project can be designed using a few basic components. The circuit diagram of this project is shown below.
More Circuit Layouts


Components List of RF Remote Relay Switch
Following is the list of all components used in this project:
- 1 X 433Mhz RF Modules
- 1X CD4017 IC
- 1X BC547 TRANSISTOR
- 1X 1N4148 DIODE
- 1X LEDS
- 1X 100nF Capacitor
- 1X 10uF CAPACITOR
- 1X 100uF CAPACITOR
- 1X 100 OHM RESISTOR
- 2X 1K RESISTORS
- 1X 10K RESISTOR
- 1x Push Button Nano
- 2X 2 PIN TERMINAL BLOCK
- 1X 5V RELAY
- 1X PREF BOARD
- JUMPER WIRES
Explanation of RF Remote Relay Switch
433MHz RF Modules:
433MHz RF modules play a crucial role in wireless communication systems. These modules work on a frequency of 433MHz, offering reliable and stable communication between the transmitter and receiver. These RF modules consist of an RF transmitter and an RF receiver, working together to establish a wireless link. The transmitter module receives input from the remote control and transmits it wirelessly to the receiver module, which then processes the received data and initiates the desired action.
The CD4017 IC:
The CD4017 IC, also known as the Johnson counter, is a popular CMOS decade counter that can toggle a single output line sequentially in response to each input pulse. This IC incorporates 10 outputs, each representing one count. When an input pulse is received, the 4017 IC switches its output pin, allowing us to control and activate various components in a specific pattern. Although designed as a decade counter, the IC can be used in various applications, including our RF remote relay switch.
The BC547 Transistor:
The BC547 is a versatile, general-purpose NPN bipolar junction transistor suitable for various amplification and switching applications. This transistor consists of three terminals: base, collector, and emitter. The BC547 transistor can handle moderate currents and voltages, making it ideal for driving relays or other electronic components. Its high current gain (beta value) allows for efficient and reliable switching, making it an essential component in our RF relay switch project.
Soldering the Circuit Connections:
Receiver Circuit:
- First connect a CD4017 IC and connect its pin-4 & pin-15 together. Its pin-8 & pin-13 to ground and pin-16 to 5v positive supply.
- Next connect a 433MHz Receiver and connect its VCC pin to positive supply, GND pin to ground.
- Connect a 10k resister between DATA pin of Receiver and pin-14 of CD4017 IC.
- Connect a 10uf capacitor’s positive pin to pin-14 and negative pin to pin-13 of CD4017 IC.
- Connect a BC547 transistor’s pin-3 to ground and also connect a 1k resister between pin-2 of BC547 transistor and pin-2 of CD4017 IC.
- Connect a 5v relay and connect its coil pin-1 to pin-1 of BC547 transistor while other coil pin-2 to positive supply.
- Next connect a 2-pin terminal block and connect its pin-1 to Normally Open pin while the other pin-2 of the terminal block to the Common pin of the relay.
- Connect anode of 1m4148 diode to pin-1 of BC547 transistor, while the cathode to positive supply.
- Connect an LED’s cathode pin to pin-1 of BC547 transistor while the anode pin will be connected to positive via a 100 ohms resister.
- Connect a 0.1uf capacitor and a 100uf capacitor from positive supply to ground. Be careful the positive to positive and negative to negative for 100uf capacitor.
Transmitter Circuit:
- First take a 433 MHz RF Transmitter and connect its GND pin to ground.
- Next connect a 1k resister between the DATA pin and VCC pin of the transmitter.
- Connect Push Button and connect its one pin to VCC pin of the transmitter while the other pin to the positive supply.
On this stage, we have completed all the connections for testing the project.
Conclusion of RF Remote Relay Switch
The creation of an RF remote relay switch using basic components like the 433MHz RF modules, CD4017 IC, and BC547 transistor is a DIY project that allows for the wireless control of electrical equipment. By following the steps mentioned above, even beginner electronics enthusiasts can build their own RF remote switch. This project combines the functionality of RF communication modules, decade counters, and bipolar junction transistors to create a reliable and efficient wireless control system. So, why wait? Gather the required components and embark on this exciting DIY journey of wireless control!
More projects, You may like:
- Video Transmitter DIY Homemade FM Radio Transmitter
- Adjustable Power Supply DIY Battery Charger
- 12V-220V 500 Watt inverter DIY Homemade
- 12V-220V H-Bridge Inverter DIY Homemade
- MPPT Solar Charge Controller DIY Homemade
- 18650 battery bank free charge protection module
- D718 B688 Bass Amplifier Homemade DIY
- C5200 Bass Amplifier DIY Homemade with Volume
- DIY LA4440 bass amplifier homemade
- C5200 A1943 TDA2030 Amplifier DIY Homemade
For more project and circuit diagrams, you can go through the Schematics in the main menu where you can find many interesting projects and circuit diagrams like audio amplifier circuits, voltage booster circuit, battery charger circuit and timer circuits etc., which are all beginner circuit projects. Feel free to check them out!
Thanks for visiting the article and watching the video.


