

Introduction:
An Adjustable Power Supply is an essential tool for anyone who tinkers with electronics. It’s a device that allows you to adjust the output voltage and current according to your needs. In this DIY guide, we will be building an Adjustable Power Supply DIY with the help of two 2n3055 transistors, one LM317 Regulator IC, one BD139 transistor, and few other components.
The advantages of building your Adjustable Power Supply are numerous. Firstly, it’s cost-effective. You can save a lot of money by building your own Adjustable Power Supply rather than buying one from the store. Secondly, it’s customizable. Since you are building it yourself, you can customize it according to your specific needs. Thirdly, it’s a great DIY project that can help you understand the basics of electronics.
Description:
I am assembling here a powerful Adjustable Power Supply DIY of 0-30 volts and 10 amperes. A pair of 2N3055 transistors is used with BD139 and LM317 to control voltage and amperes. I hope you will like this video.

Circuit diagram
of Adjustable Power Supply DIY
Before assembling the circuit, it’s important to understand the circuit diagram. The Adjustable Power Supply circuit consists of four main sections – The Transformer, Rectifier, Regulator, and Output. The transformer converts the 220V AC voltage to 30V AC. The rectifier converts the AC voltage to DC, which is then filtered using the electrolytic capacitors. The regulator (LM317) regulates the output voltage, and the output section delivers the output to the load. The circuit diagram for the Adjustable Power Supply is as follows:

More Circuit Layouts


With that said, let’s dive into the process of building an Adjustable Power Supply.

Components List
used in Adjustable Power Supply DIY
To build an Adjustable Power Supply, you will need the following parts:
- 2N3055 Transistor x 2
- LM317 Regulator IC x 1
- BD139 Transistor x 1
- 7805 Regulator IC x 1
- 0.1uf (104J) Capacitor x 3
- 0.33 Ohms / 5 Watts Resister x 2
- 1k Resister x 1
- 220 Ohms Resister x 1
- 10k Potentiometer x 1 with knob
- 5k Potentiometer x 1 with knob
- 0-30 Volts Digital Volt Meter x 1
- 12 Volts On/Off Switch x 1
- LED x 1
- 4mm Banana Connector Socket x 1 Pair
- 12v-0v-12v Transformer
- 6-10A Bridge Rectifier
- 6800uf / 50v Capacitor
- 104J / 0.01uf Capacitor
Project Images
of Adjustable Power Supply DIY
Image-1
Here I am using a 12-0-12 volt 8 Ampere transformer. I used both ends of the wiring to get 24 volts without using center tape. Also used a bridge rectifier. Solder both ends of transformer wires to pin-2 & pin-3 of the rectifier. I used a 4700uf capacitor and solder its positive side to pin-1 and negative side to pin-4. Also, I joined a pf 104J (0.1uf) in parallel with the capacitor. In this way, I am getting +24v DC from pin-1 and GND from pin-4.

Image-2
Following are 2N3055 transistors and I am using them in parallel. Solder their base with base, emitter with emitter, and collector with a collector.

Image-3
In the following image, I am showing the front panel of the power supply with a digital volt meter, 10k & 5k pots, an on/off switch, and positive/negative terminals for output.

Image-4
In the following image, connections of LM317 and BD139 are shown according to the circuit diagram provided above.

Image-5
Here I am soldering two pieces of 0.33 ohms/5 watts resistors in series with the emitters of 2N3055 transistors.

Image-6

Image-7

Image-8

Image-9

Image-10

Image-11

Image-12

Image-13

Image-14

Image-15

Conclusion
Building an Adjustable Power Supply is a great DIY project that can help you understand the basics of electronics. With the help of two 2N3055 transistors, one LM317 Regulator IC, one BD139 transistor, and few other components, you can build your own cost-effective and customizable Adjustable Power Supply. The advantages of building your Adjustable Power Supply are numerous, and it’s an excellent way to get started with electronics. We hope this DIY guide has helped you in building your Adjustable Power Supply.
You may also like:
![MPPT Solar Charge Controller DIY Homemade]()
MPPT Solar Charge Controller DIY Homemade
![How to Make Adjustable On Delay Timer]()
How to Make Adjustable On Delay Timer using 555 Timer IC
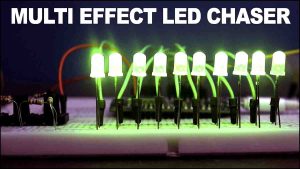
![How to make Multi Effect LED Chaser]()
How to Make Multi Effect LED Chaser ESP8266
![12V-Battery Low Volt Disconnect Circuit Diagram]()
12V-Battery Low Volt Disconnect Circuit Diagram
![How to Make Buck Converter Using 555 Timer]()
How to Make Buck Converter Using 555 Timer IC
![4000 Watt UPS Homemade DIY]()
4000 Watt UPS Homemade DIY
![How to Make Battery Level Indicator]()
How to Make Battery Level Indicator DIY
![How to Use 8X8 Dot Matrix Display]()
How to Use 8X8 Dot Matrix Display using Arduino


If I want increase the ampire 10-20 amp. What can I do?
You will have to modify the circuit somewhere including the transformer.
Plse help me
What happened?
Untuk trafo nya berapa Ampere?
Saya menggunakan 5A tetapi terserah Anda berapa banyak arus yang ingin Anda berikan untuk output.
where did you get the 12-0-12 volt 8 Ampere transformer from
From Electronics Market in my area. Any transformer winder can make it.
Hellow I enjoyed
I hop
God help you
If am right when you were testing the circuit with DC the current did not pass 0.15 or so why ?