

Introduction:
An inverter is an electric apparatus that changes direct current (DC) to alternating current (AC). It is not the same thing as an alternator, which converts mechanical energy (e.g. movement) into alternating current. Inverters are also called AC Drives, or VFD (variable frequency drive). They are electronic devices that can turn DC (Direct Current) to AC (Alternating Current). It is also responsible for controlling speed and torque for electric motors
The inverter draws its power from a 12 Volt battery (preferably deep-cycle), or several batteries wired in parallel. The battery will need to be recharged as the power is drawn out of it by the inverter. The battery can be recharged by running the automobile motor, or a gas generator, solar panels, or wind.
In this video I have made an Arduino based 12V-220V 500 Watt inverter. This inverter has feedback system, over under voltage protection system, battery low level protection system and battery level indicator. We have already mentioned below, Gerber files link, Circuit Diagram, Programming Codes and Components List.

Circuit diagram
of 12V-220V 500 Watt inverter


More Circuit Layouts


Components List
used in 12V-220V 500 Watt inverter
- 1X ARDUINO NANO
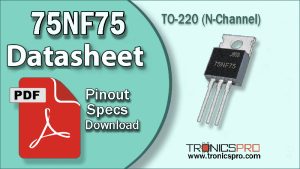
- 6 x 75N75 MOSFET
- 1 x 5V ZENER DIODE
- 2 x 1N4007 DIODES
- 5 x LED
- 2 x PC817 OPTOCOUPLERS
- 2 x 100nF CAPACITORS
- 1 x 10uF CAPACITOR
- 2 x 47uF CAPACITORS
- 1 x 1000uF CAPACITOR
- 1 x 10K TRIMPOT
- 4 x 5k TRIMPOT
- 2X 100 OHM RESISTOR
- 2x 1K RESISTORS
- 1X 2.2K RESISTOR
- 2X 10K RESISTORS
- 1X 47K RESISTOR
- 1X 220K 3W RESISTOR
- 1X 12V RELAY
- 2 x 2 PIN TERMINAL BLOCKS
- 1 x 3 PIN TERMINAL BLOCKS
Programming Code
/*
Example Timer1 Interrupt
Flash LED every second
*/
int timer1_counter,a,b,v,volt;
float bat,bt;
volatile int dut;
volatile bool sw;
void setup()
{
    Serial.begin(9600);
  pinMode(2, INPUT_PULLUP); //switch
  pinMode(3, OUTPUT); //20% battery
  pinMode(4, OUTPUT); //40% battery
  pinMode(5, OUTPUT); //60% battery
  pinMode(6, OUTPUT); //70% battery
  pinMode(7, OUTPUT); //100% battery
  pinMode(8, OUTPUT); //Relay
  pinMode(9, OUTPUT);
  pinMode(10, OUTPUT);
  // initialize timer1
  noInterrupts();           // disable all interrupts
  TCCR1A = 0;
  TCCR1B = 0;
  // Set timer1_counter to the correct value for interrupt interval

  timer1_counter = 65346;   // preload timer 65536-16MHz/8/100Hz

  TCNT1 = timer1_counter;   // preload timer
  TCCR1B |= (1 << CS11);    // 8 prescaler
  TIMSK1 |= (1 << TOIE1);   // enable timer overflow interrupt
  interrupts();             // enable all interrupts
}
ISR(TIMER1_OVF_vect)        // interrupt service routine
{
  TCNT1 = timer1_counter;   // preload timer
a++;
if(a<dut&sw){

digitalWrite(9, 1);
}if(a>dut){
digitalWrite(9, 0);
}
if(a>100&a<100+dut&sw){
digitalWrite(10, 1);
}if(a>100+dut){
digitalWrite(10, 0);
}
if(a>200){
a=0;
}
}
void loop()
{
 for(int i=0;i<50;i++){
 v=analogRead(A0);  // read feedback voltage
  bt=analogRead(A1);  // read battery voltage
  volt=volt+v;
   bat=bat+bt;
    delay(1);
  }
  volt=volt/25;

  bat=bat/500;
 Serial.print("Volt:");
  Serial.print(volt);
  Serial.print("Vac Bat:");
   Serial.print(bat);
  Serial.print("V PWM:");
  Serial.print((dut*100)/100);
   Serial.println("%");

   b++;
   if(b<6){

// battery level inticator
if(bat>9.5)digitalWrite(3, 1);
else digitalWrite(3, 0);
if(bat>10.5)digitalWrite(4, 1);
else digitalWrite(4, 0);
if(bat>11)digitalWrite(5, 1);
else digitalWrite(5, 0);
if(bat>11.5)digitalWrite(6, 1);
else digitalWrite(6, 0);
if(bat>12)digitalWrite(7, 1);
else digitalWrite(7, 0);  }
if(b>5){
  digitalWrite(7, 0);
  digitalWrite(6, 0);
  digitalWrite(5, 0);
  digitalWrite(4, 0);
  digitalWrite(3, 0);
   }
if(b>20){  b=0;
if(volt<250&volt>182&sw){
    digitalWrite(8, 1);
    }
    if(volt<180&volt>252|!sw){
    digitalWrite(8, 0);
    }
    }
if(bat<10|digitalRead(2)){
  sw=0;
   digitalWrite(9, 0);
   digitalWrite(10, 0);
  }else sw=1;

//feedback output adjustment
  if(volt<220)dut++;
  if(dut>100)dut=100;
  if(volt>220)dut--;
  if(dut<0)dut=0;
}
Explanation
A electricity inverter adjustments DC electricity from a battery into traditional AC electricity that you could use to function all forms of gadgets … electric powered lights, kitchen appliances, microwaves, electricity tools, TVs, radios, computers, to call only a few. You simply join the inverter to a battery, and plug your AC gadgets into the inverter and you have got were given transportable electricity every time and anyplace you want it.
The inverter attracts its electricity from a 12 Volt battery (ideally deep-cycle), or numerous batteries stressed in parallel. You have to recharge the battery because the inverter always draw the electricity from it. The battery may be recharged via way of means of going for walks the auto motor, or a fueloline generator, sun panels, or wind. Or you could use a battery charger plugged into an AC outlet to recharge the battery.
Download Gerber File
Gerber File: https://drive.google.com/file/d/18Ok0EteJtsWlDjYVjzKzW2nX49wtu-bX/view
Watch Video Tutorial
You may also like:
![How To Make Heart Rate Monitor Thumbnail]()
How To Make DIY Heart Rate Monitor
![Hand Gesture Controlled Car Thumbnail]()
Hand Gesture Controlled Car Robot - TRONICSpro
![CNC Plotter DIY Homemade Thumbnail]()
CNC Plotter DIY Homemade - TRONICSpro
![How to Make Voltage Booster Thumbnail]()
How to Make Voltage Booster - TRONICSpro
![500W Inverter Using 555-Timer IC 12V-220V DIY]()
500W Inverter Using 555-Timer IC 12V-220V DIY
![Arduino Batch Counter DIY Homemade]()
Arduino Batch Counter DIY Homemade
![RF Remote Relay Switch]()
How to Make RF Remote Relay Switch DIY
![USB Bladeless Fan DIY Homemade]()
USB Bladeless Fan DIY Homemade


File not exist
Hi
Please how can we increase the inverter output power from the circuit design
great, but it’s fragile despite using optics